

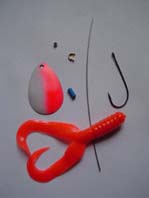
 To construct the POASK4 the following items are required:
- Stainless steel wire, 0,8 mm in diameter
- Metal clevise
- Solid brass bead 3-5 mm
- Shrinktube
- Wormhook 36 (Gamakatsu)
- Double twistertail
- Spinnerblade
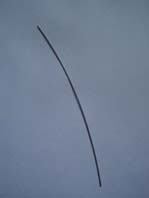
The length of the wire must be 2,5 times the size of the spinnerblade. In this case you have to cut a piece of the wire to a length of 11 cm. If necessary straighten the wire by pulling it through thumb and forefinger while bending it in the opposite direction.
By doing this the wire will heat up a bit and will be easier to bend.
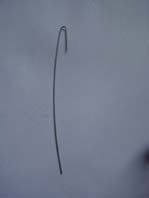
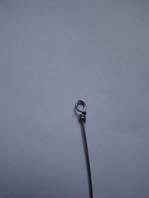
Grab the wire with a pair of roundnosed pliers, at about 1 to 1,5 cm from the end. Place the wire in your left hand in a way that the long end lies along the palm of your hand. Then turn the pliers away from yourself while keeping a firm grip on the wire and bend it round until the pliers connect.
 Now use your left thumb as a counterweight and apply a little extra force to get a incision in the semi-circle. Following this, you have to turn the wire 180° around its axis and repeat the procedure.
This way (with a little practice) you will create a nice round wire-eye.
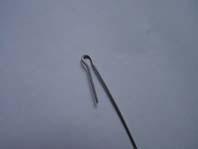
 Having completed this procedure fix the wire in a vice at the point of the wire-eye
in a way that the short end is pointing upwards. With a pair of pliers it is now possible
to twist the short end around the long end. ( the wire-shaft)
Having completed this procedure fix the wire in a vice at the point of the wire-eye
in a way that the short end is pointing upwards. With a pair of pliers it is now possible
to twist the short end around the long end. ( the wire-shaft)
Sometimes it may be necessary to finish the wrappings with a pair of pliers. In order to do so
place the pliers on the wrappings while maintaining a firm grip and completing a turning motion in the same direction as the wrappings.
If applicable the little sharp edge at the end can be ground off. The wrapping is acceptable if there are at least two wrappings next to each other.
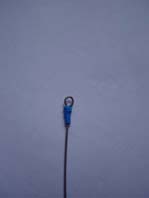
To complete the wrapping slide a piece of shrinking tube over the wrapping. Heat it with a lighter and the tube will shrink perfectly round the winding. Be careful to use the correct size of shrinking tube to avoid it from not shrinking enough. You have now created an eye in your spinner shaft.
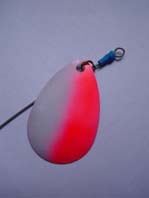
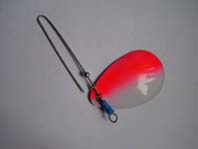
Now take the clevise and slide it with one eye on the spinner shaft. Then hang the spinnerblade
in the clevise. Of course the hollow side of the spinnerblade should face inwards from the eye.
The next step is to slide the second eye on the spinner shaft.
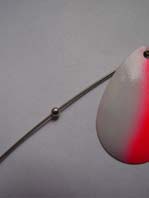
Now it is time to slide the solid brass bead onto the spinner shaft.
Use only solid brass beads for this purpose.
Take the eye of the spinner between your thumb and forefinger and position the leaf 0,5 cm under
the eye. Visuallize the middle of the part of spinner that remains and fix the wire at that point in a pair of roundnosed pliers.
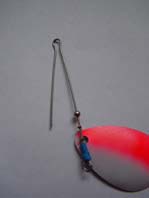
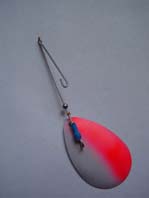
You must now bend an eye at this side of the spinner using the same method as described above. Pay close attention to the eyes of the spinner. They must be in one line with each other.
This is done on purpose to ensure that the hook is positioned correctly behind the spinner.
You now have a long piece of wire left. Take the flatnosed pliers and grab the end of the wire
over a length of 3 to 4 mm with the pliers and bend it 180°.
Take the hook that you've created with the pliers and bend it towards the spinner shaft.
Your safety-pin shaped lock is now ready.
If bent correctly, a reasonable spring-like resistance exists that closes the lock.
If not, tighten the constriction on the last bent eye.
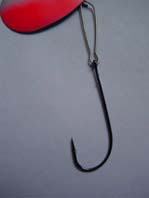
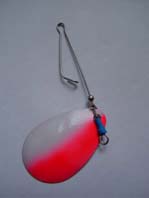
You are now ready to slide the hook on the wire and close the lock. Preferably choose a hook
that is designed for twistertails so they won't slide off. Make sure that the bead is placed on top of the lock.
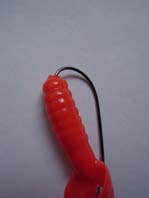
Finally attach the twistertail by sliding it onto the hook like a worm until the eye and a small part of the safety-pin are covered.
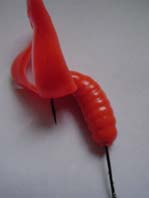

This way the twister ensures a good alignment of the hook.
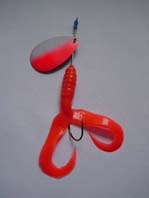
Now the POASK4 is ready.
The spinnerblade used on the POASK4 is manufactured exclusively by Hans de Boer after an extensive period of development and testing. These are available in a variety of colors
at Poask Hengelsport. Also all other components are available there.
Source: Snoek van klein tot groot en Poask Hengelsport