

I can assure you that catching a predator fish on a homebuilt lure gives you a lot of satisfaction. And I can know.
Over the years even I have, by trial and error, learnt to build my own spinners. At first, considering today's standards, I made very doltish and amateuristic spinners with a lot of arbitrary materials. The various amounts of used materials were very big and often insufficient. Sometimes a used material proved to be totally insufficient and therefore cheap materials where expensive after all.
Because you take the trouble to read this manual about building your own spinners, you probably are just as curious and a handyman by nature, like me. Perhaps not satisfied with the spinners that are offered in the shops, because of the bad quality or the high prices.
All the more reason to follow this manual through.
The necessary materials
For building your own spinner you need the following tools
A spinner is made from of the following components
I will explain step-by-step with the use of photo's how to build a spinner and where necessary give some useful tips.
In the example I took a tandem spinner with blades in size 3 and 5.
Point 1 – The spinner axis
Depending the kind and size of the spinner you pick a certain thickness of the wire. The given thickness is the minimum thickness.
|
Spinnerblade |
Wirethickness |
Spinnerblade |
Wirethickness |
|
2 -3 - 4 – 5 |
0.6 mm |
2 + 4 / 3 + 5 |
0.6 mm |
|
5 – 6 |
0.7 mm |
4 + 6 |
0.6 - 0.7 mm |
|
7 – 8 |
0.8 mm |
5 + 7 |
0.7 - 0.8 mm |
|
9 |
1.0 mm |
6 + 8 / 7 + 9 |
1.0 – 1.2 mm |
For the spinner axis always choose a single strand stainless steel wire. There are many different kind of steel wire available at your tackle-shop, music-shop (piano strings) or at your dentists wholesale dealer.
A good but expensive kind is the Remanium. This material is absolute stainless, the dentist uses it to make braces. That makes it rather expensive material. Remanium is for sale at the dentist's wholesale dealer.
You should keep in mind prices varying from 15 euro per 20 meter. For 0.6 mm up to 25 euro for 10 meter. of 0.8 mm.
Most of the times cheaper material will do as well. Take a look in the webshop at John’s Lures and Stuff for all named materials.
The length of the wire you have to cut for the spinner axis, depends on the kind of spinner you want to build.
For the spinner in our example you cut the wire of 0.65 mm at 20 cm. You want to have a little more length for the eye and the wrappings; later on you will see why.
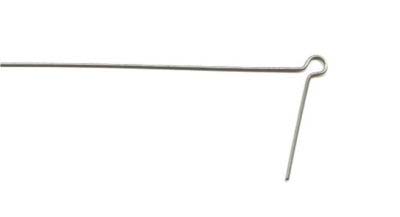
Often the wire is sold on a cylinder and therefore a bit bent. Don't worry; we will get there in a minute. We need the round nosed pair of pliers to make the eye.
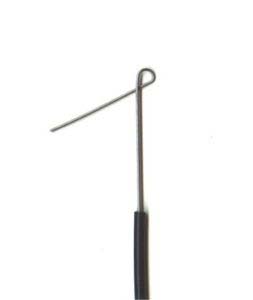
Take the piece of wire between your fingers at 5 cm. of the end, and bend it completely, until a half eye is created. The place where you start on the pliers defines the diameter of the eye. If you build a small spinner a small eye is needed, and therefore you begin at the thinner part of the pliers.
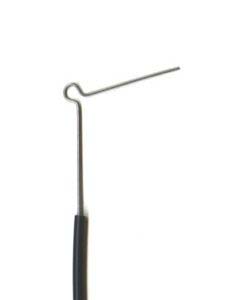
You now have an axis with a half eye and a loop.

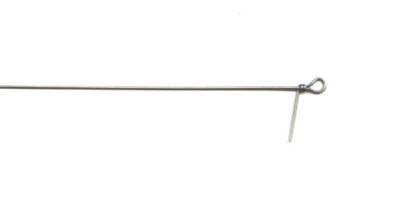
First bend the long part and after that the short part at an angle of 90°.
You now have an axis with an angle of 90° and a half eye.
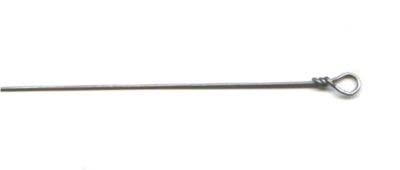
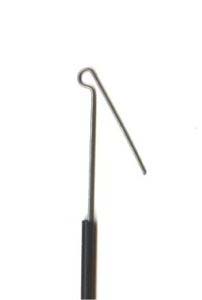
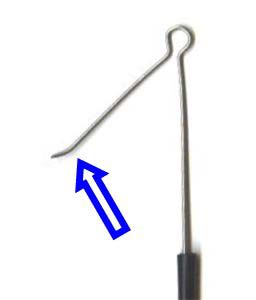
Take the whole eye in the combination-pliers and bend the short part around the axis for at least two whole strokes, or until it gets to short to hold on too. Try to put these strokes as close together as you can. The remaining wire can be cut off, and file of all rough edges.
The general rule of thumb is: the thicker the wire, the harder it will be to get nice strokes. For the best result it is recommended that you practice with thinner wire first.
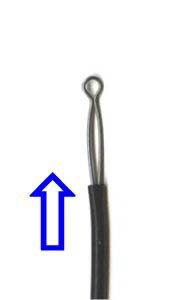
Usually the eye is not immediately perfectly round. With the round nosed pair of pliers you can correct it a bit by pinching that part of the eye gently. You can put the eye straight on the axis as well.
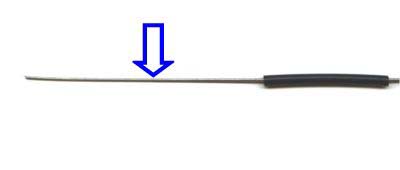
Now is the time to straighten the axis. The eye provides the necessary hold. Take the eye between you fingers and stroke the wire between your forefinger and your thumb, pressing with your thumb against the curve. With a bit of practice you will have the wire straighten in a flash. Check this by turning the axis between your fingers.
The axis is finished
In order to protect the line you can put a piece of shrinking-tube around the wrappings.
Point 2 - Building the spinner
From this point on you decide how the spinner is going to look. It also depends on where you are going to use the spinner for. We are building an unweighted tandem spinner with blades in size 3 and 5.
For this spinner we need :
The axis we already made
Spinnerblades in size 3 and 5
Clevises - 1 x size 3.5 mm and 1 x 4.5 mm
Steel beads -3 x 3.9 mm
A piece of tube in 2 sizes, somewhat smaller then the lenght of the spinnerblade
This is how we built it :
Spinner axis
Blade in size 3 with the round side to the eye on clevises of 3.5 mm
Steel bead
Piece of tube
Steel bead
Blade size 5 with the round side to the eye on a clevises of 4.5 mm
Steel bead
Piece of tube
Point 3 - Securing the spinner
In order to secure the hook or treble it is necessary to make a connection that is closed but can be opened again.
This is how I do it.
Take the axis with al the parts on it in the pair of roundnosed-pliers and hold a length that is equal to the length of the tube.
Bend it completely until an eye is made. Keep this in the same direction as the eye on top.
Now bend the eye backwards until an open eye is created.
Do the same with the short part, until you get the shape as shown in the photo below.
Now you can secure the spinner by sliding the tube in the direction of the open eye.
To prevent the tube from sliding off during a drill you can bend the end of the axis a little.
Point 4 - The hook or treble
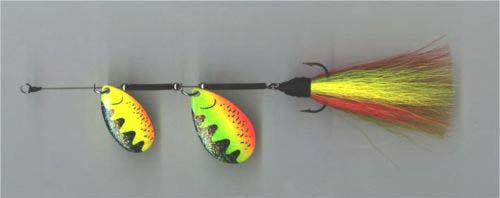
What you put on your spinner is ultimately your own choice. Some choose a single hook out of principle or practical reasons. Others choose a treble, for more hooking chances.
This goes for the decoration of the hook as well. There are a lot of different materials you can use. Like wool, rubber tails or skirts or bucktail like I love to make them.
I won't explain the decoration of the hook any further; just use your own imagination.
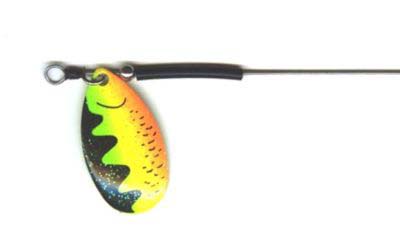
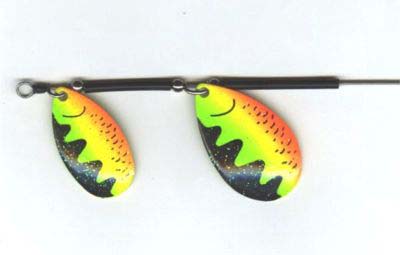
Below there's my endresult.
Check out the sites I builts John´s Roofvissite and John´s Lures and Stuff
Good luck on building your own spinners,
John Lavooij