

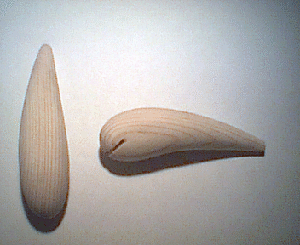
Painting crankbaits
After having designed and shaped your crankbait (also read jerkbait) and after having sanded the crankbait blank smooth, only three things remain to be done:
- To prime the lure white, which is a necessity …
- To paint color patterns, which need …
- Protection from pike teeth by lacquering the lure
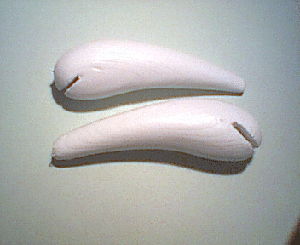
Priming the lure white
Make sure that the lure blank is as smooth as can be achieved by sanding. The smoother the better it is. Don't get all worked up because small holes and dimples can still be seen. These will be filled with paint later. I apply the primer paint by submerging the lure entirely in the can of paint. When submerging it for the first time, leave the lure in the paint long enough to soak up paint. I usually wait about 10 to 15 minutes. Next thing I do, is remove the lure from the paint jar and to hang it up to dry. After having allowed it to dry thoroughly, I start sanding the lure smooth to get rid off all the small holes. If necessary, I will sand the lure down to the bare wood.
The second coat of white primer paint acts as a base coat to allow lighter colors to show clearly and to allow the spray paint to adhere to the primer paint as good as possible. This is my opinion on this matter. Furthermore, I greatly reduce the time needed to produce lures. Make sure this coat is smooth by sanding it smooth with some sanding paper. Use sanding paper with the smallest grain you can find. I start out with sanding paper with a rougher grain. To finish this step, I use sanding paper with a small grain.
Color patterns
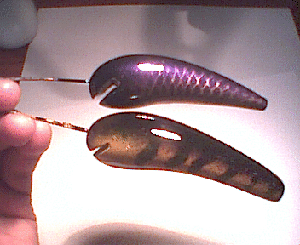
I will leave the decision of which color pattern to paint on your lures entirely up to your own creativity. Many examples can be found on this website www.lurebuilding.nl and many more can be found on the internet. I prefer to use spray cans for painting color patterns on my crankbaits. I use stencils made from cardboard or even aluminum foil and tape that is used by professional painters. I use car paint that I buy at the local paint store. Car paint has some great advantages: it's really strong and it resists scratches really well (better than regular spray paint), it has a high gloss and it dries really fast. I apply the spray paint with quickspray shots in one fluent motion. I make sure to apply one thin coat of paint each time I pass over the lure's surface and I wait several minutes between each coat. Sometimes I apply a coat of clear lacquer between two coats of spray paint to get a 3-D illusion.
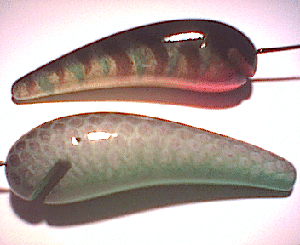
For small crankbaits or for some color patterns, I prefer to use DIY paint that I apply with a small brush (cheap brushes available at any DIY store or hobby store). Sometimes I even use nail polish, but be careful when using this because nail polish can react with other kinds of paint. I avoid this problem by coating the lure with one coat of clear lacquer before continuing with the rest of the color pattern.
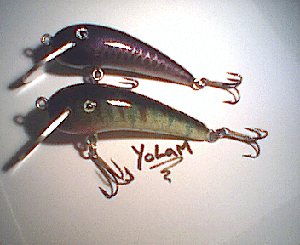
Coating the lure with lacquer
Have you finally painted your lures in a color pattern that you like? Then it's time to do the finishing touches. I use Rambo high gloss parket lacquer or yacht paint, contrary to most fanatical lurebuilders who use epoxy lacquer. I apply at least four coats of lacquer to protect the lure from pike's teeth, to achieve a high gloss and to make the lure waterproof. I submerge the crankbait in a jar of parket lacquer and I allow any excess lacquer to flow down the lure's surface. Next thing I do, is to allow the lacquer to fully harden before I apply the next coat. To ensure that the second coat adheres well to the first coat, I slightly sand the first coat with a piece of waterproof sanding paper that has a small grain. Before applying the last coat, I first screw in the screw-eyes and I glue in the diving lip to make sure the lure will be waterproof after I have applied the last coat of lacquer.
Finally, allow the lacquer to dry and to fully harden, take a picture for the archive and then … Here fishy, fishy! Come and catch me if you can!!
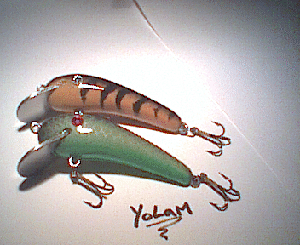
Some tips
- Make sure you always work in a well ventilated area
- If you submerge the lure blank, make sure the paint isn't too thin or too thick. A scale of 4:1 is ok
- It is advisable to clean the surface of spinnerblades and spoons before you paint them. Use a liquid cleaning product that removes dust and finger prints because these can create problems. The paint won't adhere to the surface if it is "dirty". Clean the surface afterwards with warm water.
- To get a 3-D effect in your color patterns, add a thick coat of clear lacquer between each layer of spray paint
- Saw the slot for the diving lip about 1mm wider than required to fit the diving lip in the slot. This way you don't need to mess around with cutting or filing away at the slot when paint or lacquer has settled inside it and prevents the lip from entering the slot.
- Always use a white primer when painting fluorescent colors. They show a lot brighter this way.
- Always use weatherproof paint or lacquer. These are waterproof.
- Use quick, short spray shots when painting lures with spray cans. Make sure that the paint is applied in thin layers. To achieve this result, hold the spray can quite a distance away from the lure's surface.
- Respect the time tables mentioned on the cans with lacquer or paint
- Drill a tiny hole through the lure before you paint the color pattern, from one side of the head to the other, to align the stick-on eyes (or painted eyes) properly. You can also do this after the color pattern has been sprayed but make sure not to damage the color pattern.
Marlon Li-a-young.


