

This is how I built my jerkbaits.
In the story below I want to show you how I build my jerkbaits. In order to do this I'm using a so-called "flipper" model that I happened to be working on. But it could have been any other jerkbait model. This "flipper" is a jerkbait of the hybrid type, which means that it will do anything but nothing, until you reel it in. It dances from left to right, from top to bottom and looks, if you tap it hard enough, behind him to see if there's a nasty pike following him. Very easy and a lot of fun to fish with. You just cast it in, let it sink to the right depth and reel it in with small taps with an irregular speed and an occasional pause is allowed.
Point 1 The model.
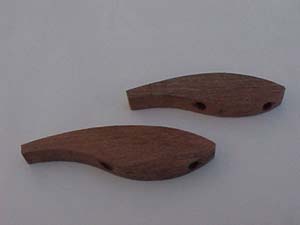
You draw the model of the jerkbait with help of a stencil on the wood of your choice. For floating jerkbaits I use red cedar and for a sinking jerkbait meranti. Use a machinal saw to saw it out. Make sure that the wooden object is symmetrically shaped after sawing it out. The machinal saw tends to wonder off into the wood while sawing. This leads to the fact that the sides are not identical. This can be corrected with a wood-rasp. Next you use a wood-rasp, a wood file, rough and fine sandpaper to round off the edges and make the wood nice and smooth. Depending on the model you can drill the holes for the leadhole(s) and the screw-eyes. Make sure you drill them exactly in the middle of the jerkbait.
Point 2 The weighting.
For the weighting I use lead that is rolled into cylinders. I do this with strips of lead of approximately 5mm wide, with a length of 20 mm, depending on the diameter of the drilled hole. When I have rolled the strip of lead it should get stuck while putting it in the hole. Then slam it tightly in the hole using a hammer and a punch, until the hole is completely filled. Next screw in the screw-eyes and add the splitrings and the trebles. Don't forget to attach a leader to the screw-eye, because the leader has some weight as well. Put it in a bucket filled with water and make sure that the jerkbait sinks slightly, but horizontally. Does the jerkbait sink too fast or oblique just drill out the lead that's too much. If the jerkbait floats then drill the hole deeper and fill it with lead again. When the weigthing has been done to your satisfaction, finish the hole with liquid wood in order to get a nice smooth finish after drying. In order to avoid disappointments I take the jerkbait to the waterside in this stage and judge the action. Of this particular type of jerkbait I built different ones that have a different sinking rate. That way I can fish at different depths. I think it is stupid to have to wait for 30 seconds before reeling in, if you want to fish at greater depths.
Point 3 The Priming.
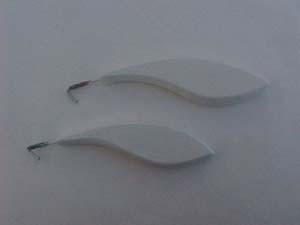
Just to make sure that you have something to hold on to during the painting I build a hook from a slim nail which I glue in the hole that will serve for the rear treble hook. The first three layers of paint on the jerkbait are primer. Between each layer I keep a drying period of 24 hours. To get a smooth result it's best to sand the surface between each layer with a sandpaper grain nr 180. This takes away all the roughness of the surface. I now leave it lying for a week to give the primer the time to dry thoroughly. Before adding the color I sand the jerkbait with a waterproof sandpaper grain nr 600. When it has dried completely I start painting. My favorite paintingmethode is stamping. Use a special stamping brush that consists of a round nob with a large amount of hair of small length. These are placed thightly together and form a hard brush. By dipping this brush in the paint and dab the bait with it gives you the result which you can see in the pictures. On some of the pictures the head of the stamping brush is shown.
Point 4 The painting.
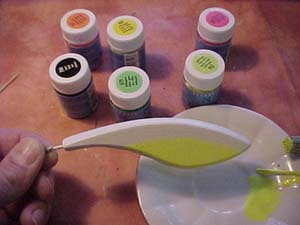
With the help of some pictures I will try to tell you how it goes. The paints I use are small pots of acryl paint (brand Talens Decorfin, wood and stone). These are available at the better DIY stores. In order to avoid the paint from drying out you put a small amount of paint (after stirring it) with a toothpick on a dish. At this dish you put the paint on the brush.
Bring on the paint of the belly first, in this case fluorescent yellow. Often I start with the light colors and finish with the darker ones. Taking that in consideration you first paint the belly, then the bottom. Next up is the back, then finish with the contrast. The last thing to do are the eyes.
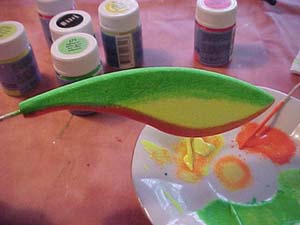
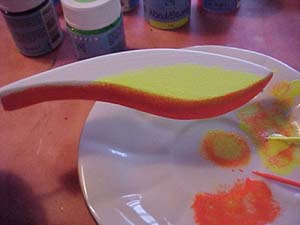
When the yellow color has been applied correctly and covers all the white primer correctly, start adding the belly color, in this case fluorescent orange.
To get a better transition from yellow to orange, mix both colors on the dish. Apply this mix on the transition line between both colors. You can use this in a creative way and make colors of different intensity.
Now it's time to apply the top color, in this case fluorescent green. Again mix the yellow with the green to get the effect that is shown in the picture.
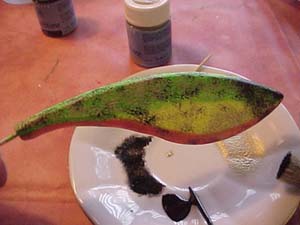
Because I like contrast on my baits I often dab a contrasting color on them using a very dry stamping brush, in this case gold and black. You can put stripes with a brush or a waterproof felt pen.
I paint the eyes using the head of differently sized nails. Select nails with a round, flat head. You dip the head of the nail in the paint and push the nail on the spot where the eye should be. By doing this with light force it gives you a nice round eye. Practice makes perfect. When the eye is dry you can paint the pupil in the same way, with a smaller sized nail head.
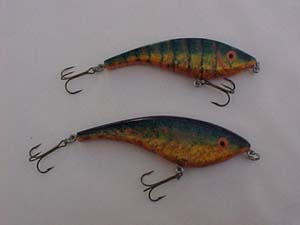
Point5 The finish.
The whole is now ready for use, if the paint wassen't very vulnerable to the weather and predator teeth. To get some protection to this you put a hard laquer layer over the paintlayers. After some experiancing I only use Silvatane of the Akzo concern. This barely gets yellow, gives a nice shiny glow and doesn't react with the paint at all. It can be brought on with a brush.
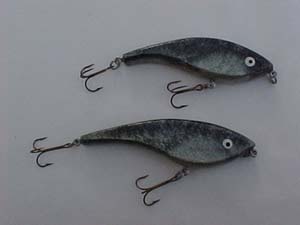
Point 6 Adding the screw-eyes.
The only thing we need to do now is to attach the screw-eyes on the jerkbait. I use screw-eyes of 28 mm. These are screwed in the drilled holes and secured with contact glue or secondenlijm. I've never had a screw-eye come off when catching a predator fish.
I hope this article gives you a good impresion of the possebilities you have when you are creating your own jerkbaits, without the use of spray cans. But be aware that painting your jerkbaits this way takes a lot of time. Further more I want to wish everybody lots of succes building your own jerkbaits, with lot of nice catches. Because there's no greater fealing for a predatorfisherman than catching a predatorfish with your homebuilt lures.
Klaas-Jan Zuidema.
K.J.C.Zuidema@12move.nl